To access TouchPoint Care, go to https://www.touchpointcare.net/
Care Coordinators will login to the TouchPoint Care portal with the Account name, personal Username, and Password.
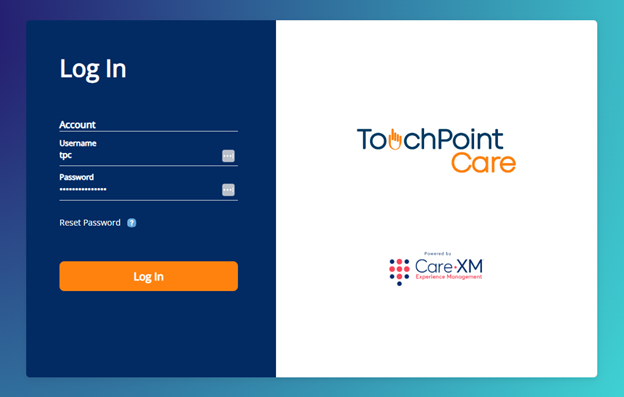
Once logged in, you will be on the landing page and can choose from the different actions by hovering over the menu bar on the left side.
Details Section
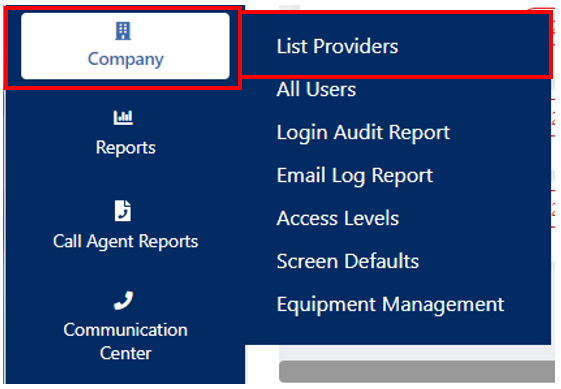
- On the menu, select "Company", then select "List Providers".
- Select Provider Name and the “Details” section will appear
- The fields with the red (required) must be filled in. In the screen shot below, the required fields are:
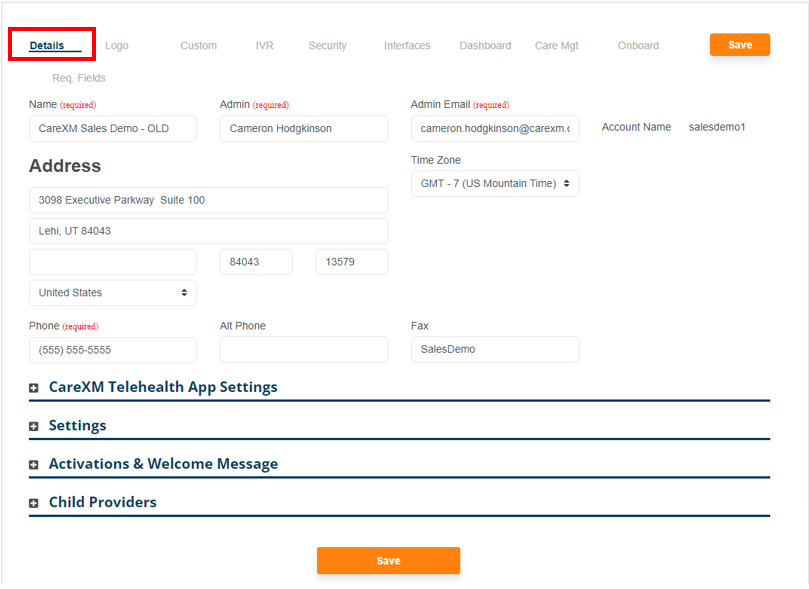
- Name – This is the number for the Provider Name.
- Admin – This is the Provider’s personal contact.
- Admin Email – It is designed to notify the Company in the event that a scheduled outbound call resulted in either “Data”, “Uncooperative”, “Deceased”, “Patient in Hospital” or “Does Not Speak English”.
- Phone and Address – This is the Provider’s personal contact.
- Time Zone – Upon entering a Provider time zone, the system will automatically default all Provider Contacts and Participants to the Provider time zone. If a Provider Contact and/or Participant are located in a different time zone the system enables the user to adjust the time zone of each.
- The system will automatically adjust the Call Schedule time based upon the Provider time zone, the Provider Contact/Call Agent time zone and the Participant time zone.
4. Scroll down and click on the plus (+) sign next to the CareXM Telehealth App Settings header and that area will appear.
CareXM Telehealth App Settings
- Prevent inactive participants from taking readings in the app – If this is checked, a patient will not be able to log vitals readings if they are suspended or discharged
- Phone number to contact when suspended – If inactive participants are prevented from taking vitals readings, this setting will be enabled. The phone number here will be included in a message to the participant to contact their care team to be reactivated and resume taking vitals readings.
5. Scroll down and click on the plus (+) sign next to the Settings header and that area will appear.

Settings
- Alert Email Setting – Setting for Display Preferences in email.
- Default Agent Screen Start Date – Default date range that will be selected when you access the Agent Screen.
- URL – Custom URL setting.
- Default Dashboard – Select your preferred Dashboard view upon entering the Communication Center.
- Maximum Call Attempts – Number of times the system will try calling someone for a scheduled TouchPoint, defaults to 4 .
- Default Agent Screen End Date – Default date range that will be selected when you access the Agent Screen.
- Default Task – Select which task is to be performed.
- Ignore Imported Old Vitals – If the system receives a reading older than the time specified here, it will not be logged.
- Show Parent Series – If this is a child account, this setting determines if the parent account level series will be displayed for creating TouchPoints. This should be enabled if you want child providers to use the questions set at the parent level.
- Use Series Name for Subject Line on Alert Emails? – This is explained when you hover the curser over the blue question mark circle.
- Risk Score – To activate risk scoring this setting needs to be configured with the type of scoring you will utilize.
- Not Used – Default setting, no risk scoring used
- Manual Entry – Field will be empty and editable for manual risk score entry
- Integration – Risk score will come from an external system to populate the TPC risk score field. The field will not be editable. Please contact your TouchPoint Care representative to utilize risk score integration.
- Question-based Calculation – The Risk Scoring Series available during participant onboarding will calculate a risk score. The field will not be editable manually.
- Theme – Determines whether you will use the new theme (Default) or old theme (3.0 – 2021).
- Default allowing participants access to video conference calls without logging in? – Sets the default for whether participants can access a video call without logging in to the application
- Select All Participants Default Provider – Select if you would like to default the provider that will populate on the All Participants page
- TriagePro – Activates the TriagePro field
- Not Used – Default setting, no risk scoring used.
- Basic – Responses to questions with TriagePro points assigned via IVR Question Settings will calculate a TriagePro score. The field will not be editable manually.
- Advanced ML – not yet available.
- Questions per Page – Allows the provider to specify how many questions they would like to appear at a time on the Call Agent screen for Outbound and Inbound calls, system default is one (1).
- Show Custom Data on Alert Emails? – Determines whether data in custom fields pulled into alerts will display in email.
6. Scroll down and click on the plus (+) sign next to the “Activations & Welcome Message” header and that area will appear.
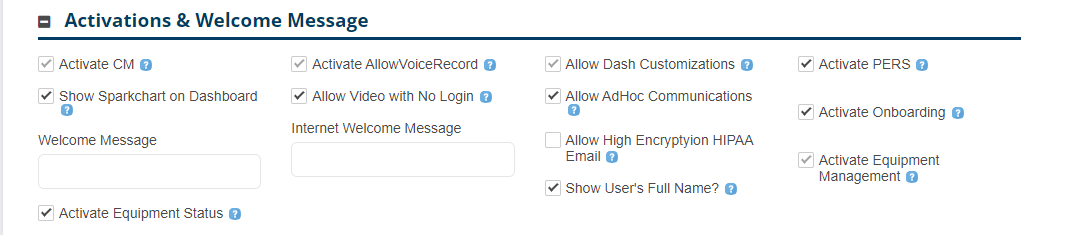
Activations & Welcome Message
- Welcome Message – The Welcome message is a user defined script to be used by the Call Agent when making outbound calls or receiving inbound calls. This Welcome Message can be overridden at the individual TouchPoint level. If you would like to include a welcome message for participants in the CareXM Telehealth application, include that text here. If this is blank, there will be no welcome message.
- Internet Welcome Message – Message shown when the patient logs into the patient web portal.
- Activate CM – Activates the Care Management module and tracks time spent on care management.
- Show Sparkchart on Dashboard – A chart of total number of alerts per day for the participant will display when hovering over the participant’s name on the dashboard.
- Activate Equipment Status – Enables tracking equipment status for participants. A dropdown for Equipment Status will become available on the participant profile.
- Allow Video with No Login – Allow users to be invited to video visits without logging in to the app
- Activate Device Ordering – Enables ordering devices directly through TouchPoint Care. This requires integration to be configured with the device logistics vendor. Contact your TouchPoint Care representative to activate this feature.
- Allow Dash Customizations – Allows for configuring the dashboard view and functionality.
- Allow Ad Hoc Communications – Allows sending participants ad hoc communications outside of scheduled TouchPoints.
- Allow High Encryption HIPAA Email – Activates encrypted email so PHI can be transmitted safely
- Show User’s Full Name? – User’s first and last name will display on documentation and reports instead of their username.
- Activate PERS – Enables the PERS tab on the participant profile. Requires integration with a PERS vendor. Contact your TouchPoint Care representative to implement PERS integration.
6. Scroll down and click on the plus (+) sign next to the “Child Providers” header and that area will appear.
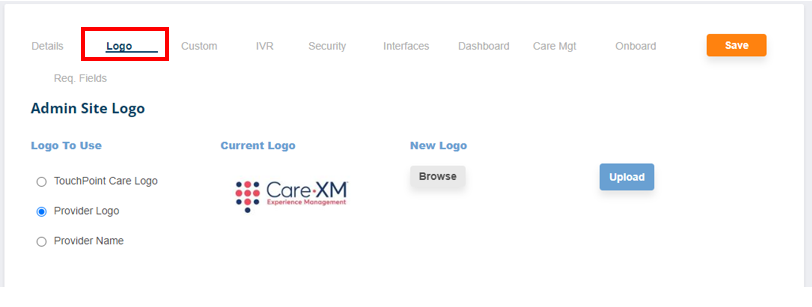
Logo Section
- On the menu, select "Company", then select "List Providers".
- Select Provider Name and the “Details” section will appear.
- Click on the Logo section on the top row
- Under the Logo section, a specific logo in .jpeg or .gif format can be downloaded and displayed.
- Click Save
Custom Section
- On the menu, select "Company", then select "List Providers".
- Select Provider Name and the “Details” section will appear.
- Click on the Custom section on the top row
- Divisions can be added by clicking on the “Add Division” button or deleted by clicking on the red trash can.
- Remember to click on the “Save” button.
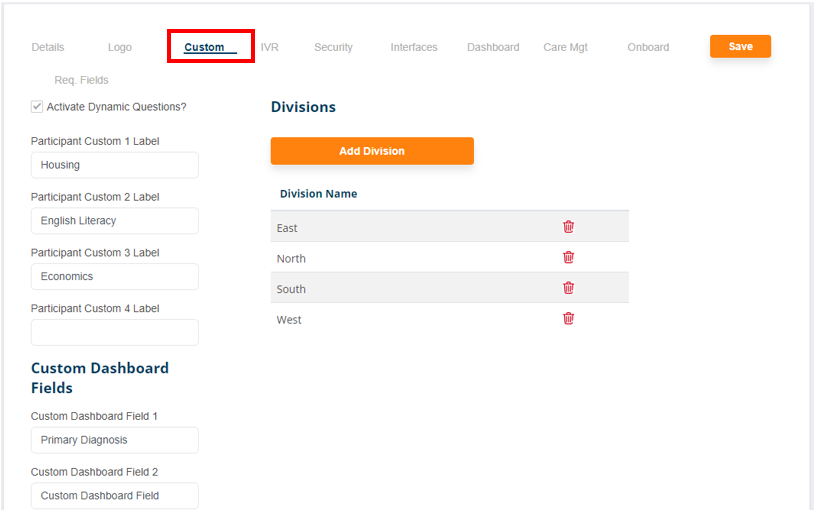
- Activate Dynamic Questions? – Check this if you would like to activate pulling patient-specific data into questions
- Participant Custom Labels – Custom free-text fields that can be added to the participant profile
- Custom Dashboard Fields – Custom fields that can be added to the dashboard
- Divisions – Divisions can be added by clicking on the “Add Division” button or deleted by clicking on the red trash can.
- Equipment Status – If you are utilizing Equipment Management, you can include a list of statuses here.
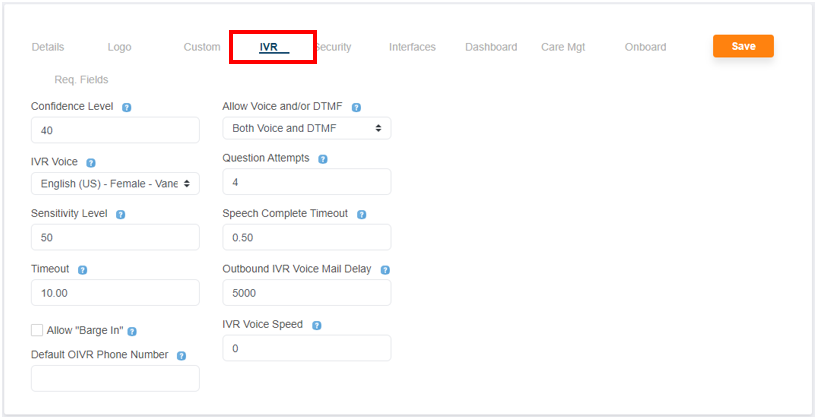
IVR (Interactive Voice Response) Section
- On the menu, select "Company", then select "List Providers".
- Select Provider Name and the “Details” section will appear.
- Click on the IVR section on the top row
- Hover the cursor over all the blue circle question marks for explanations.
- Click on the “Save” button.
Security Section
- On the menu, select "Company", then select "List Providers".
- Select Provider Name and the “Details” section will appear.
- Click on the Security Section on the top row
- Check boxes for what is required in the password.
- Click Save
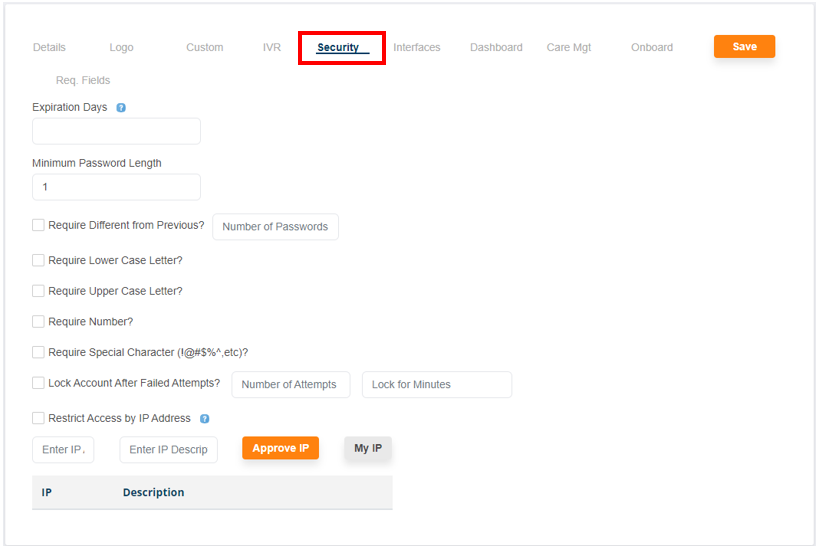
- Expiration Days – How long a user may keep a certain password before it expires.
Interfaces Section
- On the menu, select "Company", then select "List Providers".
- Select Provider Name and the “Details” section will appear.
- Click on the Interface section on the top row
- Select or deselect the check boxes based on your preference
- Click Save

- Set up what interface your organization will utilize here. Contact your TouchPointCare representative to set up new integrations.
Dashboard Section
- On the menu, select "Company", then select "List Providers".
- Select Provider Name and the “Details” section will appear.
- Click on the Dashboard section on the top row
- Select what you will see in the Clinical Management Dashboard - Communication Center
- Filter – Check boxes of what you want. Click on up/down arrows to see choices of each.
- Data Columns – Choose which columns you want to display.
- Medications – Click box if you want medications displayed.
- Vitals – Select which vitals you want on the dashboard.
- Click Save

Care Mgt Section
- On the menu, select "Company", then select "List Providers".
- Select Provider Name and the “Details” section will appear.
- Click on the Care Mgt section on the top row
- Edit the fields
- Click Save
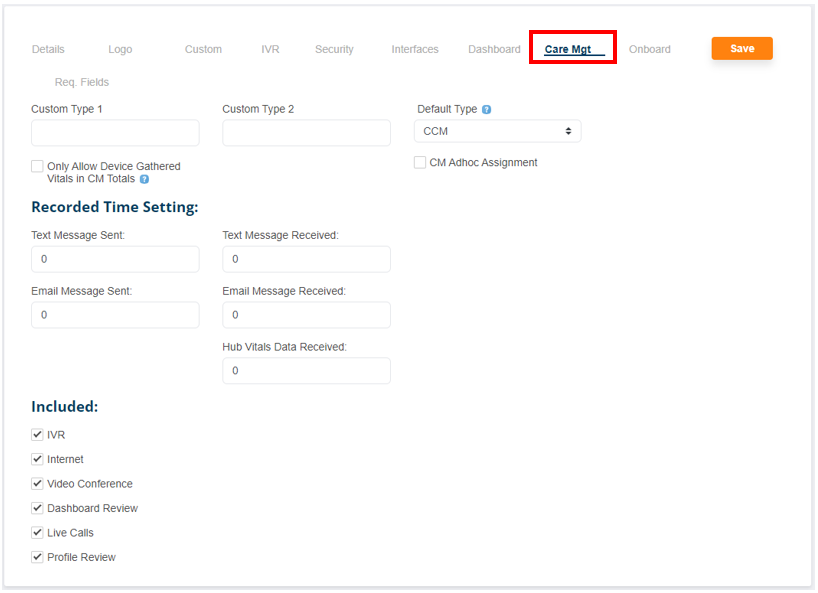
- Custom Types – Add custom types of care management to track time to.
- Default Type – Which care management type will be defaulted when you complete an activity that time will be logged for.
- Only allow device gathered vitals in CM totals – Manually entered vitals will not count toward care management days.
- Recorded Time Settings – Amount of CM time that will be logged when the following activities are completed.
- Included – Activities included in CM time.
TouchPoint Escalation Rules
- Found Under TouchPoints > Escalation Rules

- The TouchPoint Care system has been created to enable a non-clinician to act as the Call Agent to ask the questions and record the Participant responses. This Call Agent may be a Provider employee or a contracted third party. The Rules are designed to enable a Provider to automate the system behavior in the event that an outbound call results in no contact with the Participant.
- You can use escalation rules so that initial responses are reviewed by non-clinical staff and escalated as needed. Utilize Escalation Rules to automate the system behavior for different call results.
- The Rules also let the provider determine how many Outbound Call attempts to reach the participant are to be made for each scheduled call. The Outbound IVR call attempts will use these same rules and follow the same procedures as the outbound attempts. However, since it is automated, the Unavailable rule will not apply. If the call is answered and the participant is not available to answer the questions the call will be marked as Interrupted and will have to be manually processed.
- Provider Defined Rules:
- The Provider can control the system action based upon any of four Call Results that indicate there was no contact with the Participant for up to four attempts.
- The four Call Results are: “Busy”, “No Answer”, “Unavailable” or “Voice Mail”. The system allows the Provider to control the action unique to each Call Result after each attempt. The Provider can have the system automatically “Reschedule” the call for some later point in time. The Provider can also change the “Task” after one or more attempts.
- Remember to click on the "Create Rule" button

Call Agent Screen
- When a Call Agent makes a selection from the Call Results menu on the Call Agent screen, the system will automatically follow the rules established. Further, the rules can be specific to a single TouchPoint. Thus, a Provider can establish rules that are the default for all Call Schedules yet override them for one or more specific TouchPoints.
- Call agent screen:

- System Default Rules:
- These Five Call Results – “Bad Data”, “Uncooperative”, “Deceased”, “Does Not Speak English”, and “Participant in Hospital” – result in a system default whereby and email is sent to the provider Admin email address indicating that an attempt to contact a Participant had one of these five results.
- The system also inactivates the Participant and suspends any remaining scheduled calls.
- The Provider is responsible for correcting the Bad Data or resolving the language or cooperation issue and reselecting the Participant as “Active”. Upon reactivating a Participant, all remaining scheduled calls will be reinstated.
- Call Results Alerts:
- During the setting of Call Result Rules, the Provider can also elect to have email alerts sent to the Provider Admin email address if a Call Result of “Busy”, “No Answer”, “Uncooperative” or “Voice Mail” occurs.
- The user can determine after which call attempt and for which of the above Call Results an alert e-mail will be sent. In the below screen shot, an email Alert will be sent if the second call attempt results in a Call Result of “Busy”, “No Answer”, “Unavailable” and “Voice Mail”.
