To access TouchPoint Care, go to https://www.touchpointcare.net/
Care Coordinators will login to the TouchPoint Care portal with the Account name, personal Username, and Password.
Once logged in, you will be on the landing page and can choose from the different actions by hovering over the menu bar on the left side.
The Concept
- In the TouchPoint Care system, the TouchPoint is where the user associates Participants or Groups with a specific Question Series and establishes the type of contact and the schedule of contact with each Participant.
- Where a TouchPoint has multiple scheduled contacts, each specific scheduled contact is called an instance of that TouchPoint.
Create TouchPoints
To create a TouchPoint:
1. Go to "TouchPoints", then "Create TouchPoint".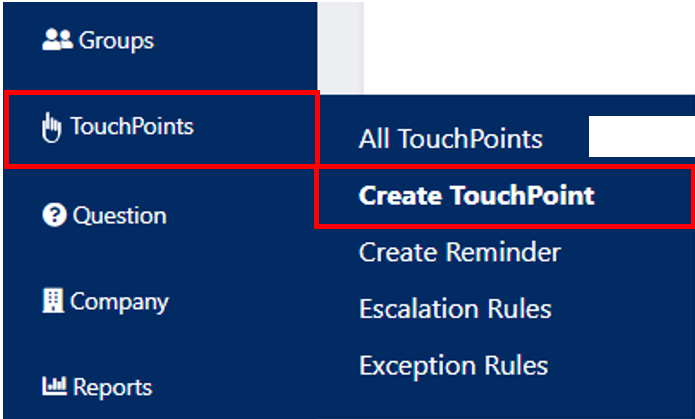
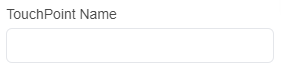
- The "Create TouchPoint" page/form will appear.
![]()
2. Give TouchPoint a name.
3. Select from the list - A Participant or Group.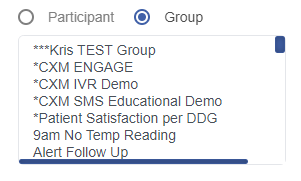
4. Select from the list - The Question Series for that participant or group.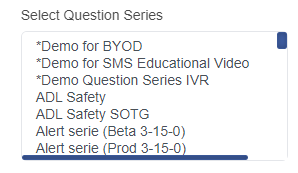
5. Fill out the rest of the form.
- For help with the scheduling questions, refer to "Creating the Contact Schedule" section below.
- For help with the "Task" box, refer to the "Task" section below.
6. Click "Create Touchpoint".
7. The user will immediately be presented with a TouchPoint Rules screen to review the settings that were selected.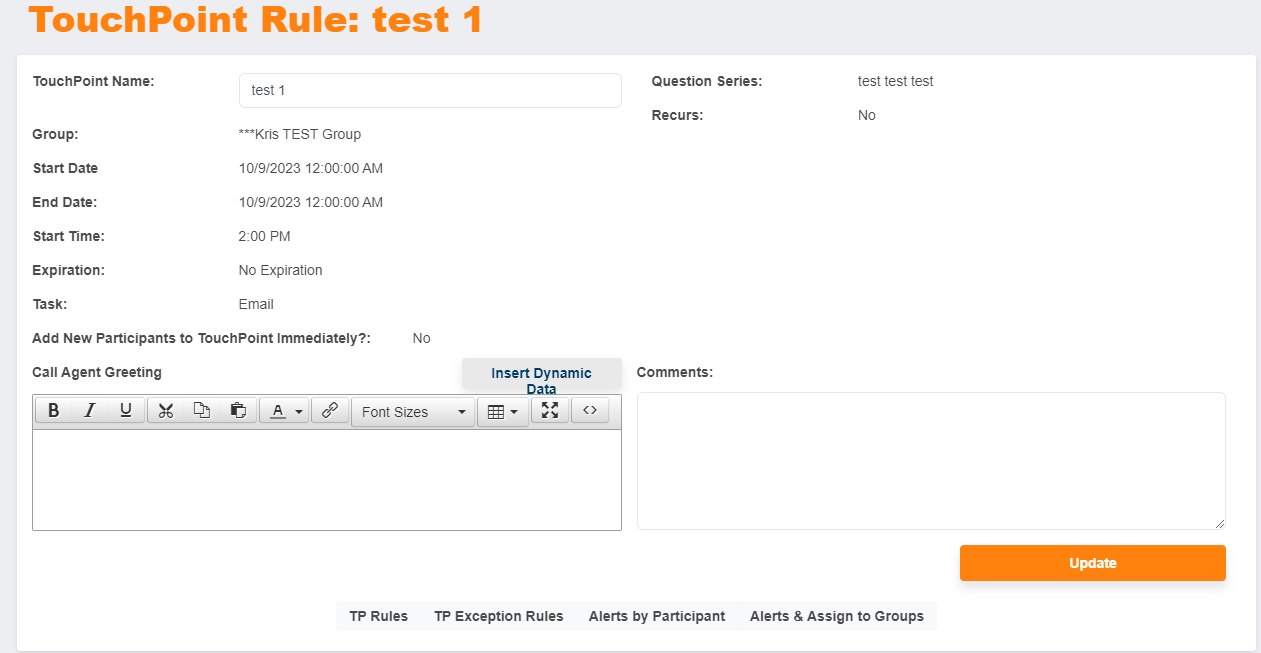
8. The user may also set and edit rules and alerts using TP Rules, TP Exception Rules, Alerts by Participant, and Alerts & Assign to Groups tabs.
- TP Rules - The user can elect to override the system level Contract Rules, established in the Company Profile, and define Contact Rules specific to the TouchPoint.

- TP Exception Rules

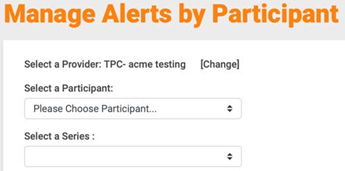
- Alerts by Participant - The user can elect to set participant specific alerts that will override previously set Global alerts.
- Alerts & Assign to Groups - The user can elect to Set/Edit Global Question Alerts at this time. Any changes to existing Global Alerts will cause historic data, if any, to be lost.

Task
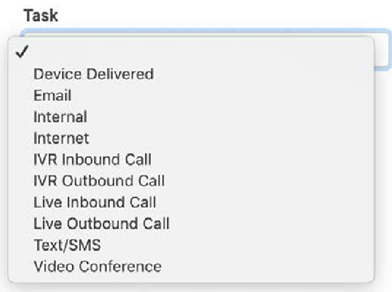
Select the TouchPoint Task from the list below:
- The Device Delivered task designates that the task will be delivered to a user’s device with the TPC application installed and they will complete the questions on their device.
- The Email task designates that the questions will be emailed to the participant to complete.
- The Internal task is an internal feature that is answered from the agent screen.
- An Internet task designates that the Participant will log onto the TouchPoint Care secure website and answer the Question Series online.
- A Live Outbound Call task designates that a lice person will call each Participant on the phone to ask them the Question Series and record the responses.
- A Live Inbound Call task designates that each Participant will call a user defined phone number where a live person will ask them the Question Series and will record their responses.
- The IVR Inbound Call task designates that each Participant will call a user defined phone number where an Interactive Voice Response system will ask them the Question Series and will record their responses.
- The IVR Outbound task designates that the Interactive Voice Response system will call the Participant and will ask them the Question Series and will record their responses.
- The Text/SMS task designates that the questions will be sent to the participant via SMS on the phone number associated with the participant.
- The Video Conference task schedules a video call on the agent screen.
Creating the Contact Schedule
The TouchPoint Care system has developed a sophisticated, yet simple to use, scheduling process that allows the user to create any possible contact schedule

- Recurring – The first step is to decide if the contact schedule is “Recurring” or more than one instance. If there is only one instance, select “No Recurrence”. Otherwise, select Daily, Weekly, or Monthly to create the desired “recurring” contact pattern. The Random Choice allows the user to select specific dates for the contact schedule.
- Start Date – The next step is to select the Start Date for when the first scheduled contact should take place.
- End Date– By selecting and entering an End Date, the system will ensure that no TouchPoint instances will occur after that date.
- End Date Example: On any date, say June 1, a TouchPoint creation begins with the Group associated with the Series. The intended contact schedule is daily contact for 5 days and an end date of June 6, or 5 days from the Start Date of the TouchPoint
- Duration – On the other hand, the Duration option enables the user to repeat a non-random contact schedule for each Participant added to the Group that is part of the TouchPoint.
- By selecting Duration and entering 10 days, the system has been programmed to do the following automatically:
- All participants in the Group on Start Date of June 1 will have a daily contact schedule with 10 instances, beginning June 1 and ending in 10 days on June 11.
- For any new Participant added to the Group after June 1, the system will repeat the entire schedule. A Participant added to the Group on June 2 will have a start date of June 2 with a scheduled contact every day for 10 days. A Participant added on June 3 will have a start date of June 3 with a scheduled contact every day for 10 days, etc.
- Duration Example: A TouchPoint is created with a start date of January 1 and a contact schedule of weekly on Monday, Wednesday, and Friday for a period of three months. By selecting Duration of 90 days the system formula will schedule contacts two days after a Participant is added to a Group for every Monday, Wednesday, and Friday for 90 days.
- Duration is a very powerful TouchPoint Care scheduling tool. By creating a TouchPoint and selecting Duration, a user can ensure that any time a Participant is added to the Group in that TouchPoint, that Participant will automatically receive that contact schedule.
- By selecting Duration and entering 10 days, the system has been programmed to do the following automatically:
- Start Time – Is the time of day when outbound, inbound and IVR calls will begin.
- Advanced Settings:
- The Expiration: after “n” days means the user can decide to cancel or expire a TouchPoint instance scheduled after “n” days. This feature is generally used for Inbound calls
- The option to “Add New Participants (Added to Group) to TouchPoint Schedule Immediately?” changes the default setting of the Duration “Start Date” formula explained above. When this option is selected it means that whenever a Participant is added to the Group in this TouchPoint, they will be included in the next scheduled contact and all subsequent scheduled contacts.
- Example: The intended contact schedule has a Start Date of April 1 and is monthly for 6 months of contact. The Duration would be set for as many days as necessary to create six scheduled contacts, once a month, or 180 days.
- By Selecting “Add New Participants (Added to Group) to TouchPoint Schedule Immediately?”, the system is now programmed to do the following automatically:
- All participants in the Group on April 1, will have a monthly contact schedule with 6 instances, beginning April 1 and ending in 6 months on September 1.
- For any new Participants added to the Group, the system will give them a Start date of April 2 with 6 schedule instances through September 1. Participants added to the Group through April 30 will have a start date of the next scheduled contact – May 1, with 6 scheduled instances though October 1, etc.
Call Agent Greeting
The Call Agent Greeting default that is established at the Provider Profile may be overridden for each specific TouchPoint by typing in the desired greeting of up to 1000 characters.

Comments
The information entered into the Comments field will be displayed on every Question Series screen associated with this TouchPoint, e.g. you may enter “In case of an emergency with any of these patients call 911”.
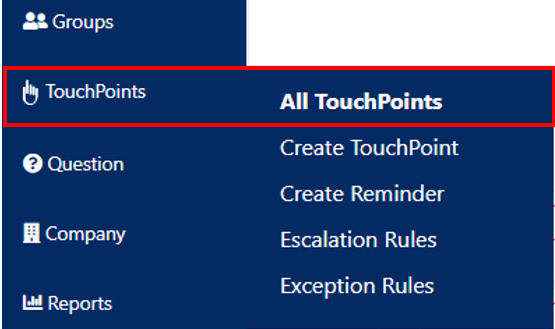
Review TouchPoints
From the Main Menu, select "TouchPoints", then "All TouchPoints". You will then be presented with a listing of all Active TouchPoints.
Filters

The All TouchPoints screen allows the user to search for any Active or Inactive TouchPoint by typing in any search criteria into the filter fields:
- TouchPoint name.
- Participant/Group name.
- Question Series name.
- From Date or To Date.
- Selecting or deselecting Active.
TouchPoint Values
Upon clicking on the TouchPoint name in the list, the system presents a screen with the TouchPoint values that were selected to initially create the Touchpoint. From this screen the user may also:
- Elect to Set/Edit Rules
- Participant and question level alerts
- Edit the Agent Greeting
- Edit TouchPoint Comments
1. Use the tabs at the bottom of the TouchPoint Rule screen to make your edits.
2. Click on the Update button to save the changes.
